
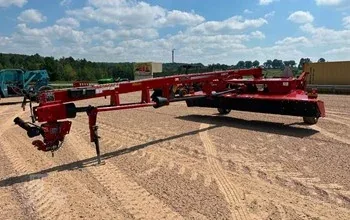
The Case IH DC162 is a reliable disc mower conditioner, but when something goes wrong in the middle of hay season, you need more than basic advice. Below are the most common problems owners face, with detailed diagnostic steps and repair procedures based on factory service information.
Problem 1: Poor Conditioning or Crop Not Feeding Properly Through the Rolls
Symptoms
Crop comes out poorly conditioned, stems are not cracked properly, material wraps on the rolls, or the windrow looks uneven.
Root Causes
- Incorrect roll gap
- Rolls out of timing
- Worn or damaged roll surfaces
- Incorrect roll pressure
- Build-up of material on the rolls
Detailed Solution
- Check and set the roll gap
- Disengage the PTO, shut off the tractor, and remove the key.
- For rubber rolls, the correct gap at the closest point is normally 0.4 – 3.0 mm (1/64 – 1/8 in).
- For steel rolls, the gap should be 5 – 7 mm (3/16 – 1/4 in).
- Apply full roll pressure, then rotate the rolls by hand one full revolution to find the tightest point. Measure at that point.
- Adjust by raising the lock plate on each end of the header and turning the adjustment bolts. One full turn of the bolt changes the gap approximately 1.6 mm (1/16 in).
- Always re-lock the plates after adjustment.
- Check roll timing
- The lugs (or rails on steel rolls) of one roll must be centered in the gaps of the opposing roll. The rolls must never touch.
- To retime: loosen the four cap screws on the top roll drive yoke flange. Center the top roll lug in the bottom roll gap while applying light reverse force on the lower roll. Tighten the screws and recheck.
- Inspect roll condition
- Look for flat spots, deep wear, cracking, or glazing on rubber rolls. Steel rolls should be checked for bent or worn rails.
- Clean any crop build-up thoroughly before running again.
Problem 2: Conditioner Drive Belt Slipping, Squealing, or Breaking
Symptoms
Belt squeals under load, rolls slow down or stop when hitting heavy crop, or the belt fails prematurely.
Root Causes
- Incorrect belt tension
- Worn or glazed belt
- Misaligned sheaves
- Worn idler or tensioner components
Detailed Solution
- Check belt tension
- The conditioner drive belt is tensioned by a spring. The spring must be set to the correct length between the hooks (typically around 209–279 mm depending on exact configuration — always verify with the service manual for your serial number).
- Loosen the lock nuts on the tension rod.
- Tighten the inner nut until the spring reaches the specified length.
- Re-lock the nuts.
- Replace the belt correctly
- Release all tension by loosening the spring tension rod.
- Remove the retaining bolt that holds the divider sheet and carefully pry the sheet away from the gearbox.
- Slide the old belt out between the divider sheet and the gearbox.
- Install the new belt the same way, making sure it sits fully in both sheaves.
- Reset the spring to the correct length and reinstall the divider sheet bolt.
- Inspect related components
- Check the sheaves for wear grooves or damage. Spin the idler pulley by hand — it should turn freely with no roughness or play. Replace any worn parts before installing a new belt.
Problem 3: Excessive Noise or Vibration from the Conditioner or Drive Area
Symptoms
Loud knocking, grinding, or vibration that increases with PTO speed, especially under load.
Root Causes
- Worn bearings in the conditioner drive gearbox
- Damaged gears
- Loose or worn drive shafts / U-joints
- Incorrect roll timing (causing rolls to contact)
- Slip clutch problems
Detailed Solution
- Isolate the noise
- Run the machine at low PTO speed with no load and listen. Then increase speed and apply load if safe. Note whether the noise comes from the conditioner gearbox, the main drive, or the rolls themselves.
- Check the conditioner drive gearbox
- Check oil level and condition. Low or dirty oil accelerates bearing and gear wear.
- Look for metal particles in the oil — this is a clear sign of internal damage.
- Check for excessive end play or roughness when turning the input shaft by hand (with the belt removed).
- Inspect the slip clutch
- The slip clutch protects the driveline. If it is set too loose it will slip under normal load; if too tight or seized it can cause damage. Check the friction discs for wear. On similar DC series machines, friction discs should be replaced before wear clearance drops below approximately 1.6 mm (1/16 in). Always reset the clutch to the correct breakaway torque after service.
Problem 4: Header Will Not Float Properly or Cuts Unevenly
Symptoms
Header digs into the ground on one side, leaves long stubble on the other, or feels too heavy/light.
Root Causes
- Incorrect flotation spring adjustment
- Worn or damaged skid shoes
- Binding in the header lift linkage
- Hydraulic issues affecting header height control
Detailed Solution
- Park the machine on level ground and lower the header.
- Check both skid shoes for even wear. Replace if one side is significantly more worn.
- Adjust the flotation springs according to the service manual procedure so the header has the correct ground pressure (typically in the 130–150 lb range on similar models for smooth fields).
- Check that the header lift linkage moves freely and is not binding.
- Inspect hydraulic cylinders and hoses for leaks or restricted movement.
Problem 5: Hydraulic Functions Slow, Weak, or Inoperative
Symptoms
Header lifts slowly, tongue swing is sluggish, or functions drift.
Root Causes
- Low hydraulic oil or contaminated oil in the tractor
- Restricted or damaged hydraulic lines
- Internal leakage in lift, tilt, or swing cylinders
- Air in the system
Detailed Solution
- Verify the tractor hydraulic system is healthy first (correct oil level, clean filter, proper pressure).
- Inspect all hoses and fittings on the DC162 for damage or leaks.
- Bleed air from the lift cylinders if the header movement is spongy.
- If one function is weak while others are normal, focus on that specific cylinder and its control circuit.
- For internal cylinder leakage, the cylinder will usually need to be removed, inspected, and resealed or replaced.
Recommended Manual
All of the procedures above should be performed using the correct torque values, clearances, and step-by-step instructions from the factory manual:
Case IH DC162 Mower Conditioner Workshop Service Repair Manual
This manual covers PTO and driveline, hydraulic system, frames and hitches, electrical system, cutter bar, gearboxes, conditioner rolls and drive, and more.
Final Advice
Most problems on the DC162 start with basic maintenance items — roll gap and timing, belt tension, oil levels in the gearboxes, and clean hydraulic oil. Fix those first. When you move past the basics, use the official service manual so you are working with the correct specifications instead of guessing.